Showing posts with label DIY. Show all posts

Wednesday, 29 October 2014

How to make: Halloween no bake mini cheesecake potions!

These super cute cheesecakes are so easy to make and quick, you can easily make them on Halloween day ready for the party! Get the kids involved too! Make it a fun Halloween night in!

So, here's what you'll need;


- your favourite biscuits (I choose shortbread, these work really well!)
- a little bit of butter 
- extra thick cream 
- a flavouring of your choice (I chose Vanilla)
- gel food colouring of your choice (I choose red and green)
- sprinkles/any Halloween toppings you like
- and little jars to put them in!

Everything I bought was enough to make two jars. I found these cute little jars in Wilko for £1 each! Make sure you give them a wash before putting food in them though! 


Place the biscuits of your choice in a big bowl. I used 6 for two people. Now looking back on it I wish I used a little more! Hopefully you'll have better judgement! You then want to smash them up into crumbs with an end of a rolling pin. This can get super messy! Really fun for the kids to do!


So next you want to add a little bit of butter, it's just to make it abit wet so you're able to mush it down in the jar. Your judgement will come in handy here too! I found it easier using my hands as the heat melted the butter faster and you can judge the texture easier. 


Once you have a damp texture, evenly put the mixture into the jars like this.


You then want to get a small spoon and press down on the mixture to form a cheesecake like base. You'll end up with something like this. If you don't feel like it's enough feel free to repeat the previous stage to add more! I wish I did this!


In a bowl, empty out all of the cream and add your chosen flavouring. Remember to keep tasting as you go, I had to add a lot of flavouring to get my desired taste!


Separate the cream into two bowls or into how many different gel colours you are using. 


Now for the magic! Add the whole tube of the gel colour to each bowl. If you use a tiny bit it will come out pastel colours. I wanted the colour darker than this but it was my first time working with colour gel! Keep mixing until the colour and the cream are all mixed together evenly. 


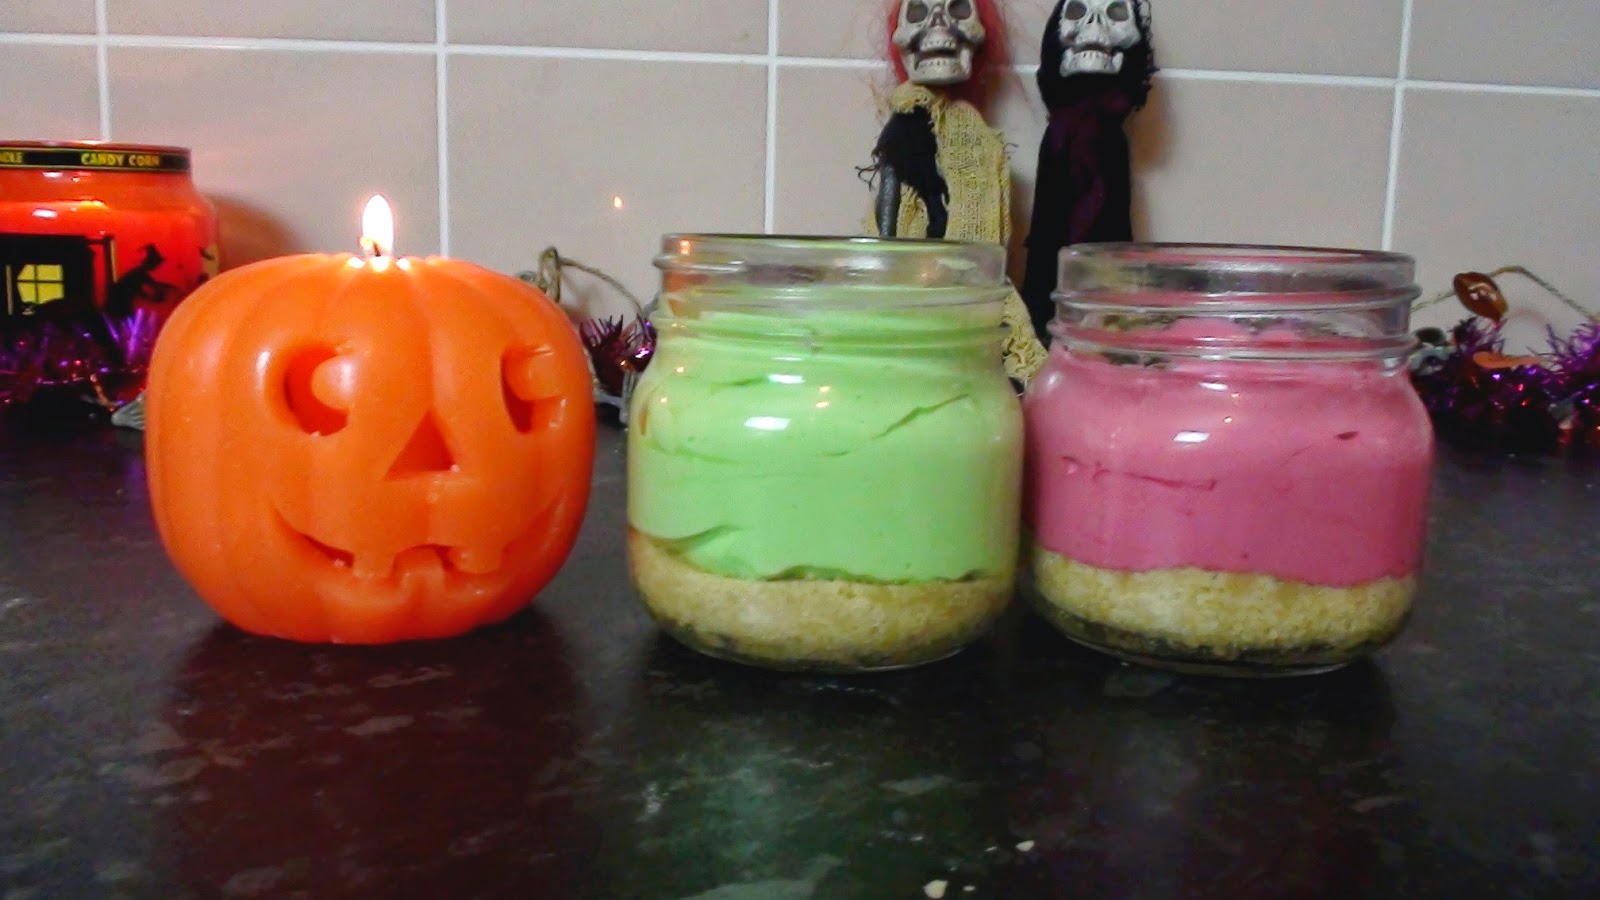
Pour the coloured cream on top of the biscuit base in the jar so you end up with something like this...


And finally, add your sprinkles or any toppings that you like! 


You can paint the jars all Halloween-y (with acrylic paint) and add cute little characters on cocktail sticks! Get your kids to draw little characters, cut them out and stick them on with blue tac, easy peasy! 

Let them chill in the fridge for about 15-20 minutes then they're ready to eat! They last in the fridge for about three days! Like I said, these are so quick and easy to make you can make them on the day for a Halloween party or even make it a little fun activity for you and your kids to do this Halloween!

Any questions or comments, don't hesitate to contact me down below and good luck! 

Wednesday, 14 December 2011

How to: Dye your eyebrows


I love dying my hair all different colours. My eyebrows are quite light as I'm naturally blonde but I do like to dye my eyebrows. I've done it once before and doing it again, so I thought I'd show you how I do it.
Please note, I am not a professional at hair colouring or eyebrow dying. What works for me may not always work for you, we're all different, it's what makes us beautiful (:

What you'll need;

-hair colour dye of your choice
-tint brush or cotton wool bud

My eyebrows are naturally lighter, if yours are dark I would advise to pre-lighten them. You can buy it in drugstores. I would not leave it on for long as it may start to burn!

Put a small amount of dye (of your choice to match your hair colour, or not!) on your tint brush/cotton wool bud and layer on your eyebrows. I make mine quite bulky making sure it's all covered.
Try not to get it on your skin, or it'll stain for a while, if you're messy, like me, you can just wipe it off with a bit of tissue.

I'm using Stargazer coral blue semi-dye, I left mine on for 30-45 minutes, I'd advise to dye in 10 minute intervals depending on the dye. After 10 minutes if it's not taken, apply for another 10 minutes and so on until you've reached your desired colour. To take off, I just wet a tissue and scrub and then dry. and done!

Good luck in your dying, and remember not to get it in your eyes! (:

Monday, 25 October 2010

halloween decorations!

these were so fun to make! and super easy (:
this D.I.Y was part of Elsie's 12 days of tricks and treats, this one was from the blog frecklewonder!

i made these for my friends halloween party on saturday, i'm so excited!


what are you going as for halloween? xo

Monday, 28 June 2010

Funny Bunny Plush Doll

So, welcome to my first post. I'm currently trying to start up a buissness (and this blog) where I can sell the things I make. I thought a blog to go along with it would be perfect (:
If you would like to know more about me, just look at my profile or I'd be happy to answer any questions you have.

I made this plush doll a while ago now and it was so much fun to make!
It's a DIY from Elsie Flannigan's blog (http://abeautifulmess.typepad.com/)
I made it for my new born nephew, Harley, who is the most gorgeous baby in the world (:


This was super fun to make and took me a couple of hours, you could make it in an evening (:
Check out how to make it here: http://abeautifulmess.typepad.com/my_weblog/2010/02/diy-monday-funny-bunny-plush-doll.html

(This bunny is obviously to sit in my nephew's room not to use as a toy!)

I'll post my own projects and paintings/drawings soon!

I'm very excited (:

pixie xo